
Discover the delight of crafting café-quality lattes right in your own kitchen! Using a milk frother is key to achieving that rich, creamy froth that elevates a simple cup of coffee to a luxurious latte. Whether you’re a coffee enthusiast or a morning brew aficionado, mastering the milk frother can transform your home coffee experience. There are several types of milk frothers to choose from, including manual, electric, and those integrated into espresso machines, each offering a unique way to achieve the perfect froth. Dive into the world of latte art and flavor with the right tools and techniques for dairy frothing, and bring the café charm to your home.
Understanding Milk Frothers
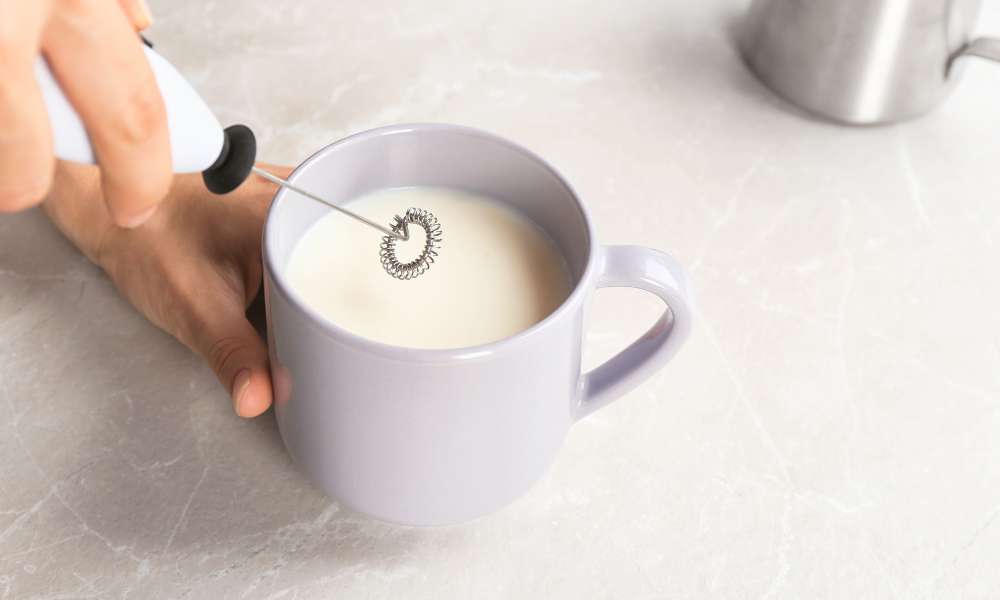
Understanding to use Milk Frother Nespresso Milk frothers are versatile tools that can elevate your coffee experience. When using a milk frother, it’s essential to follow the instructions carefully for best results. Manual frothers, operated by hand, offer a cost-effective and straightforward method for introducing air into dairy, creating light, airy froth. Electric frothers automate this process, delivering consistent results with minimal effort. For those with espresso machines, frother attachments streamline the process even further, integrating frothing directly into coffee preparation. The core principle behind all dairy frothers is the incorporation of air into milk, changing its texture from liquid to a creamy, voluminous froth essential for top-tier lattes. Mastering these tools can elevate your home café experience, providing professional-quality drinks effortlessly.
Choosing the Right Milk Frother
Choosing the right dairy frother for lattes requires considering several factors to ensure you get the most from your home barista experience. Budget is a primary concern; manual frothers are generally more affordable, while electric models can be an investment that pays off in convenience and consistency. Consider how often you’ll use the frother: daily drinkers might prefer the durability and ease of an electric frother, whereas occasional users might opt for the manual type. Desired froth quality also plays a critical role; electric frothers typically provide more control over the froth’s texture. Lastly, weigh the ease of use and cleaning—manual frothers require more effort but are simpler to clean, while electric frothers offer effortless frothing at the push of a button but may have more components to clean.
The Best Milk Types for Frothing
When using a milk frother for lattes, selecting the right type of dairy is crucial for achieving the best froth quality. Dairy milks like whole and skim dairy are popular for their creamy texture and frothing capabilities. Whole milk, with its higher fat content, tends to create a richer, more stable froth, ideal for lattes. Skim milk, on the other hand, offers a lighter froth with more volume but less richness. For those preferring non-dairy options, almond and soy dairy are excellent choices. Almond dairy provides a slightly sweet flavor and decent frothing properties, while soy dairy is known for creating a creamy, stable froth similar to dairy. Each milk type’s fat content significantly influences the froth’s stability and texture, affecting the overall quality of your latte.
Preparing to Froth Milk
To master the art of using a milk frother for lattes, the right equipment is essential. Begin by selecting a suitable frother—manual, electric, or an espresso machine attachment—based on your needs and preferences. The choice of container is also crucial; opt for a pitcher designed specifically for frothing, as its shape can help achieve the best swirl and aeration. Before you start frothing, consider two key pre-frothing steps: temperature and dairy volume. Milk should be cold, as it froths better when chilled, and the volume should not exceed one-third of your pitcher to allow space for the dairy to expand and froth up. These preliminary steps ensure that your latte turns out with the perfect temperature and texture every time.
Step-by-Step Guide to Frothing Milk for Lattes
Creating the perfect latte at home starts with mastering your milk frother. **Using a manual frother**, begin by chilling your chosen dairy. Pour it into the frother until one-third full to allow space for expansion. Secure the lid and pump the plunger vigorously for 15-20 seconds or until the dairy is frothy and has roughly doubled in volume. For those **using an electric frother**, start by filling the frother with cold dairy up to the marked line. Switch on the device and let it operate until the dairy becomes creamy and frothy, which typically takes about one to two minutes. Both methods require monitoring the milk’s volume and starting temperature, ensuring you achieve that silky, smooth froth that’s essential for a professional-quality latte.
Tips for Perfect Froth Every Time
Achieving the perfect froth every time when using a dairy frother for lattes boils down to mastering a few key techniques and temperature insights. For ideal results, start with cold milk; the optimal temperature for frothing is typically around 4-7°C (39-45°F). This cooler starting point helps create a smoother, more consistent froth. Technique-wise, if you’re using a manual frother, ensure vigorous and consistent pumping to incorporate as much air as possible without overdoing it. For electric frothers, ensure the device settings are adjusted according to the type of dairy used, as different milks froth differently. A consistent technique will help you achieve a velvety texture that’s just right for layering atop your espresso, enhancing both the flavor and visual appeal of your latte.
Incorporating Frothed Milk into Your Latte
Incorporating frothed dairy into your latte artfully is crucial for achieving that signature café-style quality. To create perfect layers, gently pour the frothed dairy over an espresso base, tilting the cup slightly as you pour slowly and steadily. This technique allows the heavier dairy to sink beneath the espresso while the lighter foam layers on top, creating a beautiful separation of textures. When mixing espresso and milk, aim for a balance where neither ingredient overshadows the other. Start with a robust shot of espresso and complement it with the velvety froth, ensuring the milk’s creaminess enhances the espresso’s rich flavor without diluting it. Mastery of these pouring and mixing techniques will elevate your home-made latte to professional standards, impressing any coffee lover.
Cleaning and Maintenance of Milk Frothers
Keeping your dairy frother in optimal condition involves regular cleaning and maintenance. After each use, promptly rinse the frother with warm water to remove dairy residues. For a deeper clean, disassemble the parts if possible, and wash them with mild detergent and warm water. Use a soft brush or sponge to avoid damaging the frother’s interior. For electric frothers, ensure the electrical components do not come into contact with water. Periodically, descale the frother by using a vinegar-water solution to remove any mineral buildup, enhancing its longevity and performance. Following these daily and long-term maintenance steps will ensure that your dairy frother continues to produce perfect froth for your lattes, maintaining both hygiene and functionality over time.
Common Mistakes to Avoid
Avoid common frothing mistakes to ensure your latte is always a delightful experience. Over-frothing can lead to stiff, dry foam, while under-frothing results in flat, uninspiring dairy. To sidestep these issues, monitor the milk’s temperature closely—too hot and it will scald, too cold and it won’t froth properly. Aim for the sweet spot between 60-65°C (140-149°F) for optimal results. Additionally, regular maintenance is crucial. Neglecting to clean your frother can lead to buildup that degrades both its function and the taste of your lattes. Ensure you rinse and clean your frother after each use and conduct a deep clean weekly. By avoiding these common errors, you’ll maintain your frother’s efficiency and enjoy perfect lattes every time.
Conclusion
Mastering the use of a dairy frother is essential for enhancing your home latte experience. Perfect frothing not only elevates the texture and taste of your latte but also adds a professional touch to your coffee creations. Remember, the key to a great latte lies in the balance and quality of froth, which can be achieved with a bit of practice and the right techniques. Don’t hesitate to experiment with different types of milk—dairy or non-dairy—to discover which one suits your taste and froths best. Each variation offers a unique flavor and frothing characteristic, providing endless possibilities for your latte adventures. Keep practicing and refining your skills to enjoy café-quality lattes right at home.